Sunday, August 8, 2010

worm composting!


i am so excited about worms right now. i’ve been hearing about worm composting for a while, and now that we’re living in a space with a garden (and no curbside composting) we decided to go for it.

so the first question is: where do you get worms?
i did some research on this, and it turns out that while earthworms are great for your garden, they are not the ones you want in your compost bin. as it was explained to me, earthworms are kind of solitary, slow-eating fellows, who generally like to stay buried in the dirt. the worms you want for composting are the kind that like to live in a colony, come to the surface to eat (the term is “epigeic”), and eat their body weight in food every day. there are two types of ideal composting worms: red wrigglers and blueworms. now, i read somewhere that you could pick up bait worms from a fishing shop and those would work – but i don’t do enough fishing to know if that’s true, and i suppose it depends on your bait shop. it’s worth a shot if you can distinguish red/blue worms from earthworms.

this is the blueworm, Perionyx excavatus
as it turns out, there is a worm store – yes, a store devoted to worm composting –two blocks from our new house. what are the chances of that? so even though i balked at paying $40 for ¼ lb of worms (!) we went there to get our worm colony set up. i figure, as long as this works out i’ll only have to buy them once and then they’ll make worm babies and i can give them away to friends (or start selling them for $120/lb!).
so we went to the worm store and they were super helpful answering all our worm questions. the worms eat any kind of food scraps, paper, cardboard, leaves – they don’t recommend putting in meat or dairy because it spoils and smells bad and can attract other kinds of critters to your worm bin. i’ve also heard not to put garlic or onions in there, but the guy at the worm store said that’s just for the sake of smell, the worms will eat it. what I found out recently from my friend noelle recently is they don’t like rice, so i’ve been avoiding putting rice in the bin.
we left the worm store with a ziplock baggie full of worms and dirt – and because we had a few more errands to run and I didn’t want to leave them in the hot car – i carried around a purse full of worms for the afternoon.


we made the worm bin ourselves, it’s really easy so i don’t recommend buying a worm bin unless you’ve got money to burn. i got a tupperware bin from walmart for $5 - i think i bought a bigger size than I needed for starting out (18 gallons), but i figure the worms can grow into it. i would actually recommend starting out with a smaller bin (like 10 gallons), since the worm guy said if they're in a large bin they spend more time looking for food and for each other to mate, so they eat/reproduce more slowly. we drilled ¼” holes on the bottom, sides, and lid for ventilation, and then put it up on cement blocks with a tray underneath to catch the worm juice. yep, worm juice. they call it “worm tea” and it supposedly makes a really good fertilizer for your plants – you can dilute it 20:1 and spritz the leaves, or water the soil with it.

when we got the worms home we had to make up their bedding. so we layered a burlap bag on the bottom of the bin – to encourage them to stay in there and not slip out the holes in the bottom. then we ripped up strips of newspaper and crumpled it and moistened it to make a bed. i guess they really like to bed in newspaper (or regular shredded paper) and they’ll eventually break it down too.


then it was time to put the worms in their new home. we poured out the worms and dirt from the ziplock, and they say you should mix in some of the dirt they’re used to into your new bedding, this involves slowly carving away at the outsides of the dirt pile. these worms really don’t like light, so they’ll dive inward away from the outside of the pile as you carve the dirt away, leaving a wriggling ball of worms in the middle – which is pretty fun.


once you’ve got the dirt mixed in with the bedding you can put your worm ball in there – don’t break them up, they’ll do that on their own. and then feed them and put more newspaper on top and tuck them in with another layer of burlap. you can leave your worm bin uncovered – which helps with ventilation, but it also invites other critters in there and since our backyard is a lizard haven I didn’t want to encourage the lizards to predate our worms – those little buggers are expensive! so we keep a lid on ours.


if you figure they eat their body weight in food a day, you can start out feeding them ¼ lb of food scraps daily – or what we’ve been doing is keeping a bag of scraps in the freezer and then feeding them the whole bag at the end of the week. i’ve also heard that the freezing process helps break down the food so they can eat it faster. keep in mind you have to thaw it before putting it in the bin – you don’t want frozen worms. as they start to break down the newspaper you can add more, and always bury your food scraps underneath the newspaper layer, and keep everything moist – they like moist, dark conditions. you can even keep your worm bin inside your house – but since we have very limited indoor space we’re keeping them in the shade outside. you can expect other kinds of bugs and stuff to live in there with the worms and help break down the food. as long as you keep nice conditions for the worms they should leave peacefully together. They worm guy said that if your colony is unhealthy that’s when other organisms can come in and take over.


and that’s it! they’re super low maintenance and so gratifying. marty and i never thought we’d be so excited about worms. they look really happy themselves; they’ve been getting fatter and reproducing. and though they were kind of shy for the first week and hanging out at the bottom of the bin, now they’re eager to come up and eat stuff. 


our first few feedings were really coffee grounds- heavy, because that was pretty much all we were producing in waste when we first moved in. i’m not sure how the worms deal with coffee, but i figured we might be cracking them out on caffeine, so i stopped putting coffee grounds in, and started sprinkling them around the outsides of our planter boxes so discourage slugs from munching our vegetables. i also try to chop tougher things – like rinds and peels – up before feeding it to them, just to encourage the breakdown process.
the worm poops are called “vermicast,” also known as “gardeners gold” because it’s great for planting and adding extra nutrients to your garden. once your worms have eaten their way through about 6 months worth of food, you can harvest the vermicast – and separate out some worms to give away if you like. i’ll give a full report when we’re ready to harvest.

Sunday, June 13, 2010

ho'i'o: foraging for fiddleheads


on the continent they're called fiddleheads. here in hawai'i they're known as ho'i'o. unless you're from maui - then they are pohole. or if you're japanese, in which case: warabi. these are my current vegetable obsession. closely followed by watercress - but more on that later.


i have had the incredible good fortune of spending a lot of time lately in waiahole, where my friend maile lives with a waterfall, taro patches, gardens, and a very sweet dog. maile invited us out a few weeks ago for a "true food sovereignty experience" - foraging in near her stream for young fern shoots. i love foraging. it's so satisfying. i think i could spend all day rummaging around in ferns taller than myself, hunting for those tightly curled little fronds, bursting with life. the first time we picked we were advised not to be careful with the rest of the fern leaves - the mature ones. the more you knock those down the more the plant send out new shoots, and i have been reaping the bounty on that advice as new shoots come up weekly.


you can eat them right there while you're picking; raw they have a kind of what my aunty wanda calls "gneah-gneah" quality to them. meaning, i think, that they leave a bit of a texture on the roof of your mouth. i would describe ho'i'o as the cross between asparagus and okra. but much prettier. it's got that firm, watery, tasty quality of asparagus with a bit of the slimy this-must-be-good-for-me quality of okra.


 the most popular way to eat ho'i'o is in a salad, where you blanch the ferns and combine them with opae (shrimps), tomato and onion.  i tried a number of different dishes using ho'i'o, like stir fried with leftover ahi poke and chili peppers. or sauteed with carmelized onions. i also made my own version of ho'i'o salad, adapting grandma ho's recipe for watercress salad. this went over pretty well at a couple of potlucks, so i'll share that recipe with you here.


ho'i'o salmon salad

1 block tofu, drained and cubed
2 tomatoes, diced
3 green onions, finely chopped
1 package bean sprouts (1/2 lb?), blanched
1 can salmon
1 can bamboo shoots, sliced thin
1 can baby corn
as much ho'i'o as you like, blanched

sauce
1/2 cup vegetable oil
1 Tbs sesame oil
3/4 cup soy sauce
juice of 1/2 lemon


just layer the ingredients in an order that's visually appealing - with the ho'i'o on top to showcase it, and then pour the sauce on top. obviously all of those ingredients are optional - i added the bamboo shoots and baby corn, that does not feature in grandma's watercress salad - which she was sure to let me know.
there aren't any photos of this salad because, well, when i'm cooking for a potluck i'm usually running late. so here's a photo of  one of what they look like in a pan. i'd love to hear about any other dishes you've tried with fern shoots - leave a comment!

thanks to maile for the photos and for the experience!

Tuesday, May 25, 2010

if emeril lagasse were korean, this is how he would make sangria.


definitely one of my favorite things about living in oakland was our frequent trips to "the beach." i know that i now live in hawai'i where there are *real* beaches, and i do appreciate those too, but there is a special place in my heart for that grassy spot on lake merritt where we would pop a bottle of bubbles on a sunny afternoon and watch the people in the town pass by.


on one such beautiful recent sunday afternoon we were joined by our good friend sierra, and decided to stray from our usual champagne fare to make our own sangria. i'm a big fan of sangria, and not a big fan of spending a lot of money (boy am i sad to be living in the land of ridiculously expensive produce). so i took this recipe from emeril lagasse's "essence of emeril" food network and adapted it to fit whatever was available cheaply at the korean market up the street. here's the original recipe:


Ingredients

    * 1 (750-ml) bottle red wine
    * 1/4 cup brandy
    * 1/4 cup orange flavored liqueur (recommended: triple sec or Grand Marnier)
    * 2 tablespoons fresh lime juice
    * 2 tablespoons fresh orange juice
    * 1/4 cup sugar
    * 1/2 orange, thinly sliced
    * 1/2 lemon, thinly sliced
    * 1 unwaxed apple, cored, and cut into thin wedges
    * 1 (750-ml) bottle sparkling water, chilled

Combine everything but the sparkling water in a large plastic container or glass pitchers. Cover and chill completely, 1 to 2 hours. When ready to serve, add the sparkling water.
i found our favorite cheap wine, crane lake, which tastes pretty terrible on its own, but mixed with all this other delicious stuff it's perfect. and it only costs $3/bottle. so we doubled the recipe. we were blessed with a continuing overflow of VSOP from our winter brandy drink days (thanks, megan) - including spiced cider and eggnog, and courtesy of sierra's grandma's liquor cabinet we also had triple sec. i picked up limes, lemons, and a ton of mandarins from the koreans, plus some fantastic meyer lemons we had from marty's uncle bobby's place (i sure miss those). rather than apple i went for the nectarines that were on sale at the korean market, which ended up being mostly overripe, but some of it was salvageable and along with the mandarins gave a nice sweetness to the sangria.


that's pretty much all i have to say about that - it was the best sunday afternoon ever. thumbs up for sangria. thanks to sierra and marty for sharing it with me. definitely fond memories for the town.

Friday, May 21, 2010

irish car bomb cupcakes

this week's mission was to make some kind of incredible thank-you gift to show my appreciation to our friends brutus and kyle, who let marty and i stay at their apartment all week preceding my cousin's wedding. cupcakes have been on my mind lately, and thanks to rachel's suggestion i headed over to smitten kitchen for this incredible recipe.


if you're unfamiliar with the drink sensation that is the "irish car bomb" it goes something like this: you take a shot glass and fill it half full of bailey's irish cream; float jameson irish whiskey on top to fill the shot glass, which you then drop (glass and all) into 3/4 pint of guinness and chug. i don't say "chug" lightly here. this is what they call a "volatile drink" - meaning it not only froths and foams when you drop the shot into the beer, but it will also start to curdle almost immediately if you let it, so you really don't want to waste time.

perhaps it's in bad taste to name a drink after an act of violence, and perhaps i'm perpetuating that by claiming the name for these cupcakes, but i admire a nation that refers to its period of ethno-political conflict as "The Troubles," and chocolate whiskey and beer cupcakes just doesn't have the same ring to it.

i've said it before, but smitten kitchen is brilliant. who would think to turn that into cupcake form? feel free to submit a comment here with suggestions of what else you'd like to see turned into cupcake form. i'll see what i can make happen.

i should also mention that these may top the list of most expensive homemade cupcakes ever.


could these few ingredients actually cost over $45? in hawai'i they sure can.
don't let this dissuade you from trying - i'm sure if you live someplace where food is reasonably priced you won't have the sticker shock. it's just that here in the most oil-dependent state in the nation we import 90% of our food from overseas, and that's a problem.

i drew the line at the $4 whole paycheck foods wanted to charge me for paper cupcake liners, and i'm going to go ahead and encourage a cultural shift here - do we really need to have our cupcakes half-wrapped in paper? my cupcake tin is nonstick, so it's not an issue on my end, and i am hopeful that the recipients of my baked goods will embrace the going green aspect of their gift.

i should also say these are not cupcakes for the fainthearted - neither for the baking nor the eating. it took me a solid 3 hours of baking/assembly, and well - you can see the ingredients.

so here's the recipe - from smitten kitchen: (with my comments in italics)
Chocolate Whiskey and Beer Cupcakes
Makes 20 to 24 cupcakes

For the Guinness Chocolate Cupcakes

1 cup stout (such as Guinness)
1 cup (2 sticks) unsalted butter
3/4 cup unsweetened cocoa powder (preferably Dutch-process)
2 cups all purpose flour
2 cups sugar
1 1/2 teaspoons baking soda
3/4 teaspoon salt
2 large eggs
2/3 cup sour cream

Ganache Filling (Updated to double it, based on many commenters suggestions — thanks!)
8 ounces bittersweet chocolate
2/3 cup heavy cream
2 tablespoons butter, room temperature
1 to 2 teaspoons Irish whiskey (I recommend Jameson, though I had to substitute Jack Daniels because that's all I could find in the tiny airplane-sized bottle, and since i'm living in the house of jehovah right now with grandma ho i don't have the usual bottle of jameson in the cupboard)

Baileys Frosting
3 to 4 cups confections sugar
1 stick (1/2 cup or 4 ounces) unsalted butter, at room temperature
3 to 4 tablespoons Baileys (or milk, or heavy cream, or a combination thereof)

Special equipment: 1-inch round cookie cutter or an apple corer and a piping bag (though a plastic bag with the corner snipped off will also work - unless you let your ganache chill too long and then you bust multiple holes in the ziplock bag that result in many spouts for frosting, ahem)

Make the cupcakes: Preheat oven to 350°F. Line 24 cupcake cups with liners (or not - save the earth!). Bring 1 cup stout and 1 cup butter to simmer in heavy large saucepan over medium heat. notice that says one cup of guinness - that means you'll have to drink the rest of the beer while baking, bonus! Add cocoa powder and whisk until mixture is smooth. Cool slightly.

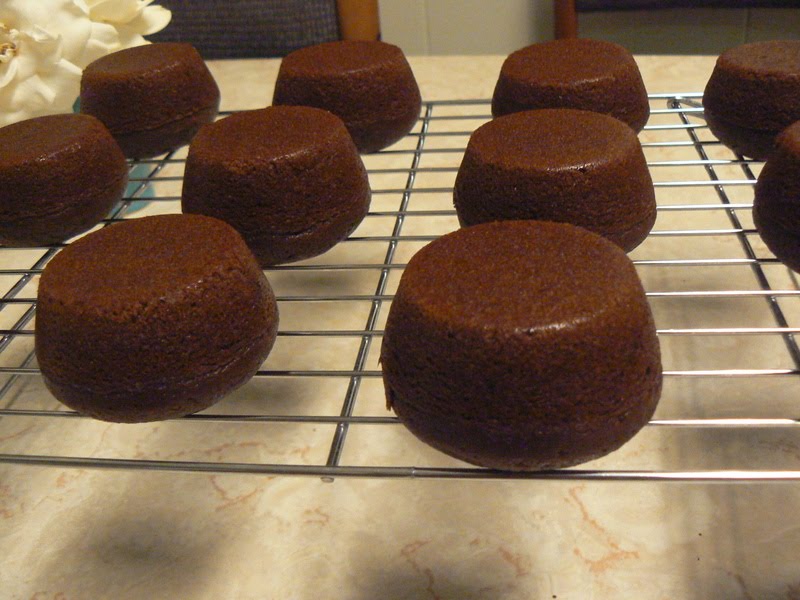
Whisk flour, sugar, baking soda, and 3/4 teaspoon salt in large bowl to blend. Using electric mixer, beat eggs and sour cream in another large bowl to blend. Add stout-chocolate mixture to egg mixture and beat just to combine. Add flour mixture and beat briefly on slow speed. Using rubber spatula, fold batter until completely combined. Divide batter among cupcake liners, filling them 2/3 to 3/4 of the way. Bake cake until tester inserted into center comes out clean, rotating them once front to back if your oven bakes unevenly, about 17 minutes. Cool cupcakes on a rack completely. my cupcakes took 16-17 mins and were very fluffy/springy. i couldn't tell if they really tasted like guinness, or if i just had that taste in my mouth from finishing off the beer.

Make the filling: Chop the chocolate and transfer it to a heatproof bowl. Heat the cream until simmering and pour it over the chocolate. Let it sit for one minute and then stir until smooth. (If this has not sufficiently melted the chocolate, you can return it to a double-boiler to gently melt what remains. 20 seconds in the microwave, watching carefully, will also work.) Add the butter and whiskey (if you’re using it) and stir until combined. i used the microwave method - since i have use of a microwave at grandma's house and the chocolate melting process can be a little nerve-wracking when you're worried about ruining that hella expensive chocolate you just bought - it took maybe 2 rounds of 30 seconds each with a lot of stirring in between rounds to get there - don't overdo it. i have to say here, the chocolate ganache went from "mmm, that's tasty" with the ghiradelli and cream to "i may just have to pipe that directly into my mouth and forgo the whole cupcake thing" when i added the whiskey. turns out whiskey and chocolate is a knockout combination. i would even go ahead and add another couple teaspoons of whiskey next time to bump up the flavor. i was worried about it preventing the ganache from setting, but it set just fine.

Fill the cupcakes: Let the ganache cool until thick but still soft enough to be piped (the fridge will speed this along but you must stir it every 10 minutes). Meanwhile, using your 1-inch round cookie cutter or an apple corer, cut the centers out of the cooled cupcakes. You want to go most of the way down the cupcake but not cut through the bottom — aim for 2/3 of the way. A slim spoon or grapefruit knife will help you get the center out. Those are your “tasters”. Put the ganache into a piping bag with a wide tip and fill the holes in each cupcake to the top.
she says "tasters" here like there are going to be cute little plugs of cake to pop in your mouth, but what i ended up with was a big pile of crumbs. not that that stopped me from shoving a handful in my mouth.

i'm including a picture of what an apple corer looks like here - because i had to ask somebody myself. it worked great, and i probably didn't even need the grapefruit knife, though i was super excited to have an excuse to use what is probably my favorite utensil of all time - grandma ho has this special grapefruit knife that has one end with two blades so that you can cut up both sides of the grapefruit section at the same time - i love this knife and i think about it every time i eat grapefruit. that's not the end i used for the cupcakes, i'm just excited about it.
 
Make the frosting: Whip the butter in the bowl of an electric mixer, or with a hand mixer, for several minutes. You want to get it very light and fluffy. Slowly add the powdered sugar, a few tablespoons at a time. if i could have located my sifter after the move i would have used it here to sift in the powdered sugar so i wouldn't have to content with the lumps.

[This is a fantastic trick I picked up while working on the cupcakes article for Martha Stewart Living; the test kitchen chefs had found that when they added the sugar slowly, quick buttercream frostings got less grainy, and tended to require less sugar to thicken them up.]

When the frosting looks thick enough to spread, drizzle in the Baileys (or milk) and whip it until combined. If this has made the frosting too thin (it shouldn’t, but just in case) beat in another spoonful or two of powdered sugar.
Ice and decorate the cupcakes.


i was being stingy with the ganache at first, but i ended up with extra at the end - so don't be shy to fill them full. i also chilled the ganache a little too long in the fridge - and didn't let it come back to room temp before putting it into my makeshift pastry bag, so i busted some extra holes in the sides which ended up decorating the area around my cupcakes and hands as well.

i experimented with a few different designs. here's what the combination of whiskey ganache and baileys frosting looks like:

Do ahead: You can bake the cupcakes a week or two in advance and store them, well wrapped, in the freezer. You can also fill them before you freeze them. They also keep filled — or filled and frosted — in the fridge for a day. (Longer, they will start to get stale.)


i'll let you know how they are received.

Tuesday, April 27, 2010

falafel waffles

ok, so i can't take credit for it, but this is a brilliant idea: waffles made of falafel.
falafel waffles, if you will.


i love falafel, but mostly the crispy outsides, when it comes to the crumbly middle part of the falafel balls i'm less than interested. so when i found this suggestion to make falafel in the waffle iron i couldn't wait to try. plus you have the benefit of not having to deep fry the falafel balls. don't get me wrong, i have NO problem with frying stuff (and especially eating fried stuff), but it's probably healthy to try out other methods of cooking once in a while. the post i found uses falafel from a mix and reports success, but that's not what we do around here, so here's the falafel recipe i used to make it from scratch, from joan nathan's The Foods of Israel Today:


    * 1 cup dried chickpeas
    * 1/2 large onion, roughly chopped (about 1 cup)
    * 2 tablespoons finely chopped fresh parsley
    * 2 tablespoons finely chopped fresh cilantro
    * 1 teaspoon salt
    * 1/2-1 teaspoon dried hot red pepper
    * 4 cloves of garlic
    * 1 teaspoon cumin
    * 1 teaspoon baking powder
    * 4-6 tablespoons flour


1. Put the chickpeas in a large bowl and add enough cold water to cover them by at least 2 inches. Let soak overnight, then drain. Or use canned chickpeas, drained.

2. Place the drained, uncooked chickpeas and the onions in the bowl of a food processor fitted with a steel blade. Add the parsley, cilantro, salt, hot pepper, garlic, and cumin. Process until blended but not pureed.
(i followed the recipe here - but i would actually say go ahead and puree for the purposes of waffle falafel-making)

3. Sprinkle in the baking powder and 4 tablespoons of the flour, and pulse. You want to add enough bulgur or flour so that the dough forms a small ball and no longer sticks to your hands. Turn into a bowl and refrigerate, covered, for several hours.


after refrigerating the mixture you can heat up your waffle iron and oil both sides generously. i found it a little awkward to pat the falafel into the waffle iron, since i'm used to pouring a liquid into the iron that then puffs up. this is not like that, what you put into the iron is what you get out - no expanding or shrinking, so go ahead and pat it in all the way to the edges. bake until golden brown.


i decided to use the waffles to dip into sauces, tahini sauce and raita - rather than putting them into pitas with lettuce and tomatoes as a sandwich, though that would also be good. the tahini sauce was a big hit, and the raita was a delicious pairing - deceptively hot and cool at the same time (marty's concept of a "pinch" of cayenne is a little more like one of my handfuls).

here are the recipes for those sauces:

Tahini Sauce (via Epicurious)

Gourmet | January 2004 
Yield: Makes about 1 1/4 cups
 

ingredients
2 garlic cloves
1/2 teaspoon fine sea salt, or to taste
1/2 cup well-stirred tahini (Middle Eastern sesame paste)
1/3 cup fresh lemon juice
1/4 cup water
1/4 cup olive oil
1 tablespoon finely chopped fresh cilantro
1 tablespoon finely chopped fresh flat-leaf parsley
1/4 teaspoon ground cumin

Mince garlic, then mash to a paste with sea salt. Whisk together garlic paste and remaining ingredients until combined well. Cooks' note: Tahini sauce can be made 1 day ahead and chilled, covered. Bring to room temperature before serving.


Cucumber-Mint Raita (via Epicurious)
Bon Appétit | August 2004
Yield: Makes 8 servings

ingredients
1 large unpeeled English hothouse cucumber, halved, seeded, coarsely grated
2 cups plain whole-milk yogurt
1/4 cup (packed) chopped fresh mint
1 teaspoon ground cumin
1/4 teaspoon plus pinch of cayenne pepper
preparation

Wrap grated cucumber in kitchen towel and squeeze dry. Whisk yogurt, mint, cumin, and 1/4 teaspoon cayenne pepper in medium bowl to blend. Add cucumbers and toss to coat. Season raita to taste with salt and pepper. Cover and refrigerate at least 2 hours. (Can be prepared 1 day ahead. Keep refrigerated.) Sprinkle raita with pinch of cayenne pepper and serve.

Enjoy - and leave a comment to let me know how it goes if you try it!